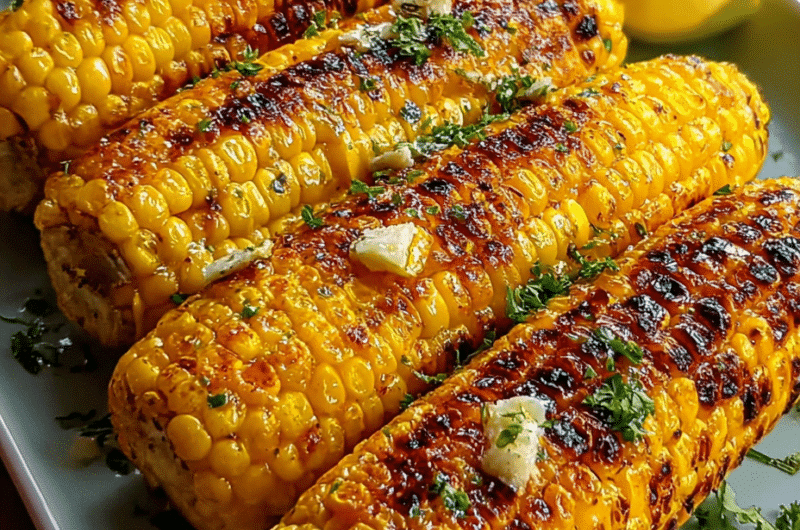
There’s something about summer that makes me crave corn on the cob. Maybe it’s the warm evenings or the fact that my kids will actually eat their vegetables when they’re slathered in butter. Whatever it is, grilled corn has become our go-to side dish from June through September. What truly makes this Easy Grilled Corn on the Cob special is the combination of sweet, juicy kernels kissed by the grill’s heat, resulting in a vibrant flavor that’s simply irresistible.
Why This Easy Grilled Corn on the Cob Recipe Works
This recipe stands out because it transforms ordinary corn into a delicious summer treat. The grilling process caramelizes the sugars in the corn, enhancing its natural sweetness and adding a delightful smoky flavor. With just a few simple techniques and ingredients, you can achieve perfectly charred corn that’s both tender and crispy.
What makes this recipe even better is the use of avocado oil for grilling. It has a high smoke point, which means it won’t burn easily on the grill, allowing for a perfect char without the risk of bitterness. The seasoned butter adds a rich, savory touch that melts beautifully into the hot corn, making every bite a flavor explosion.
- Grilling enhances the natural sweetness of the corn.
- Avocado oil prevents sticking and promotes better browning.
- The technique of rotating the corn ensures even cooking and char.
- Adding seasoned butter amplifies flavor and richness.
- Serving with lime wedges brightens and balances the dish.
Expert Tips for the Best Easy Grilled Corn on the Cob
Preheat Your GrillStart by preheating your grill to medium-high heat, around 400°F. This ensures the corn cooks evenly and develops those beautiful char marks.
Choose the Right CornOpt for fresh, sweet corn that’s in season. Look for plump, firm ears with bright green husks and golden silk. The fresher the corn, the sweeter and juicier it will be.
Use Avocado OilBrush the corn with avocado oil before grilling. This oil has a high smoke point, making it perfect for grilling and preventing the corn from sticking to the grates.
Rotate RegularlyGrill the corn for about 10 to 15 minutes, turning every 2-3 minutes. This frequent rotation helps avoid burning and ensures even charring on all sides.
Don’t OvercookWatch the corn closely; it’s done when you see light golden-brown char marks and the kernels feel tender when pierced. Overcooking can lead to dried-out kernels, so keep an eye on it!
Customize Your ButterFeel free to experiment with the seasoned butter. Add garlic powder, lime zest, or even a sprinkle of chili powder for a kick. This is your chance to make the recipe your own!
Avoid Common MistakesOne common mistake is not drying the corn after shucking. Pat it dry to ensure the oil adheres properly and helps with browning. Also, avoid using low smoke point oils like olive oil, which can burn quickly on the grill.

Variations and Substitutions
- Elote Corn Recipe: Add cotija cheese, cilantro, and chili powder for a traditional Mexican street corn twist.
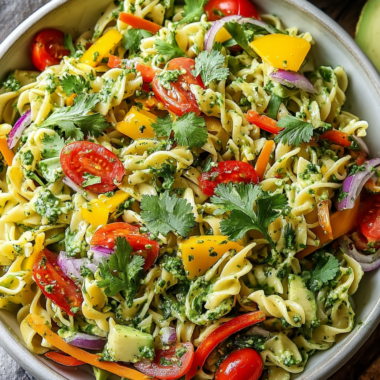
- Corn Salad Recipe: Cut the kernels off the cob after grilling and toss them in a salad with tomatoes, avocado, and lime dressing.
- Dairy-Free Option: Use vegan butter instead of regular butter for a dairy-free version that still tastes delicious.
- Air Fryer Method: For a quick alternative, cook the corn in an air fryer at 400°F for about 10 minutes, shaking halfway through.
- Instant Pot Method: If you’re short on time, steam the corn in an Instant Pot for 3-4 minutes, then finish on the grill for char.
How to Store and Reheat Easy Grilled Corn on the Cob
If you have any leftovers, you can store grilled corn in the refrigerator for up to 3 days. Just wrap it in foil or place it in an airtight container to keep it fresh.
Yes, grilled corn is freezer-friendly! Wrap the corn tightly in plastic wrap and then place it in a freezer bag. It can last for up to 3 months in the freezer.
To reheat, the oven is the best option. Preheat it to 350°F and place the corn on a baking sheet for about 10-15 minutes, or until heated through. If you’re in a hurry, the microwave works too—heat on high for about 1-2 minutes, but be careful not to overcook.
What to Serve with Easy Grilled Corn on the Cob
This delicious grilled corn pairs perfectly with a variety of dishes. Here are some suggestions:
- Grilled Chicken: Juicy, marinated chicken complements the smoky flavor of the corn.
- BBQ Ribs: The sweetness of the corn balances well with tangy barbecue sauce.
- Fish Tacos: Fresh and zesty, these are a match made in heaven with grilled corn on the side.
- Simple Garlic Bread: A crunchy, buttery side that rounds out a summer meal beautifully.
- Watermelon Salad: Sweet and refreshing, this salad adds a nice contrast to the warm, grilled corn.

Easy Grilled Corn on the Cob – Ready in 30 Minutes
Course: Main CourseCuisine: AmericanDifficulty: Easy4
servings5
minutes10
minutes350
kcalIngredients
4 ears corn (shucked and cleaned of silk)
2 tbsp avocado oil
2 tbsp unsalted butter (such as Kerrygold)
1 tsp sea salt
3/4 tsp freshly cracked black pepper
1/2 tsp smoked paprika
1 lime, cut into wedges
Directions
- While your grill preheats, prepare a small bowl and combine the softened butter, sea salt, freshly cracked black pepper, and smoked paprika—this creates a seasoned butter that will melt beautifully onto the hot corn. The corn should already be shucked and cleaned of silk, so pat it dry with paper towels to ensure the oil adheres properly and promotes better browning on the grill.
- Brush all sides of each ear of corn evenly with the avocado oil—this high-heat oil creates a better char and prevents sticking on the grill grates. While you’re doing this, heat your grill to medium-high temperature (around 400°F), allowing it to fully preheat and the grates to become hot enough that water droplets sizzle on contact. I find that preheating for at least 5 minutes ensures even cooking and beautiful grill marks.
- Place the oiled corn directly on the grill grates and cook for 10 to 15 minutes total, rotating every 2-3 minutes to ensure even charring on all sides. This frequent turning prevents any single side from burning and creates that desirable combination of light charring and tenderness. The corn is done when it has light golden-brown char marks on most sides and the kernels are hot and tender when pierced with a knife.
- Transfer the hot corn from the grill to a serving platter and immediately brush or rub each ear generously with the seasoned butter mixture from Step 1—the residual heat will melt the butter perfectly into all the nooks and crannies. Serve right away with lime wedges on the side so guests can add brightness and extra flavor to each bite. I love letting people finish their own corn at the table with a squeeze of fresh lime for a personal touch.
Frequently Asked Questions
Can I make Easy Grilled Corn on the Cob ahead of time?
Yes, you can grill the corn ahead of time. Just make sure to store it properly in the refrigerator and reheat before serving. However, for the best flavor and texture, I recommend grilling just before serving whenever possible.
How long does Easy Grilled Corn on the Cob last in the fridge?
Grilled corn can last in the refrigerator for up to 3 days when stored in an airtight container or wrapped tightly in foil. Be sure to check for freshness before consuming any leftovers.
Can I freeze Easy Grilled Corn on the Cob?
Absolutely! You can freeze grilled corn by wrapping it tightly in plastic wrap and then placing it in a freezer bag. It will stay fresh for up to 3 months in the freezer, making it a great option for meal prep.
What is the best way to season grilled corn?
For the best flavor, brush the corn with a mixture of butter or avocado oil, sea salt, freshly cracked black pepper, and smoked paprika. This combination adds richness and a smoky depth that elevates the corn’s natural sweetness.
Can I grill corn with the husks on?
Yes, grilling corn with the husks on is an option! It helps steam the corn while grilling, keeping it moist. Just soak the ears of corn in water for about 30 minutes before grilling to prevent the husks from burning.