Why This Oreo Brookies Bars Recipe Works
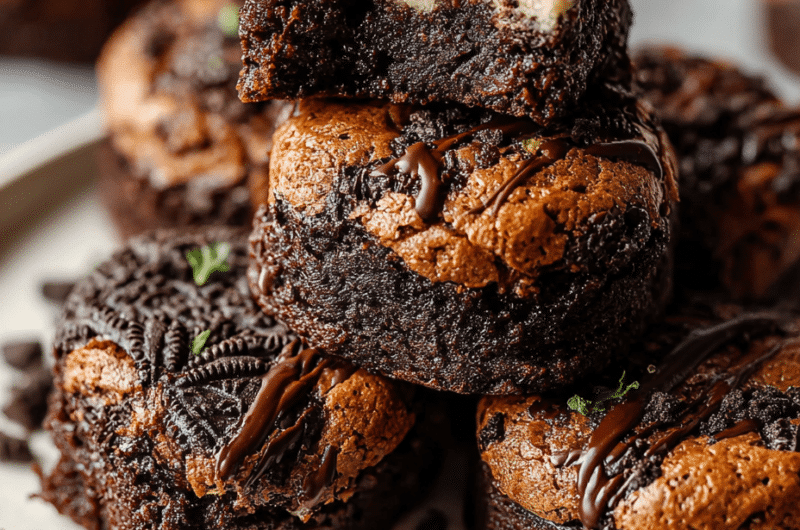
This Oreo Brookies Bars recipe stands out because it combines the best of both worlds: chewy brownies and soft, delicious cookie dough. The addition of Oreo cookies not only adds a delightful crunch but also infuses the bars with a rich, creamy flavor that makes every bite unforgettable. What makes this recipe even better is the balance of textures. The brownie layer is dense and fudgy, while the cookie dough topping is tender and slightly crisp around the edges. Here are some reasons why this recipe works so well:- Layered Textures: The combination of fudgy brownies with soft cookie dough creates a satisfying contrast that’s hard to resist.
- Quick and Easy: With minimal prep time and a straightforward baking process, you can whip these up in no time.
- Flavor Explosion: The Oreo cookies add a unique flavor profile that elevates the classic brookies recipe cookie brownies to new heights.
Expert Tips for the Best Oreo Brookies Bars
To ensure your Oreo Brookies Bars are nothing short of perfect, follow these actionable tips: 1. Use Room Temperature Ingredients: Make sure your eggs and butter are at room temperature. This helps to create a smoother batter and better texture. 2. Don’t Overmix the Batter: When combining your wet and dry ingredients, mix until just combined. Overmixing can lead to tough bars. 3. Preheat Your Oven to 350°F: Ensure your oven is fully preheated before baking. This guarantees even cooking and the right rise. 4. Line Your Baking Pan: Use parchment paper to line your baking pan. This makes for easy removal and cleanup. 5. Press the Oreos Firmly: When placing the Oreo cookies on top of the brownie layer, press them in gently but firmly. This helps them integrate into the bars while baking. 6. Bake for 30 Minutes: Keep an eye on the timer and check for doneness. You want a slight jiggle in the center, but the edges should be set. 7. Let Them Cool Completely: Allow your bars to cool in the pan for at least 15 minutes before cutting. This helps them set and makes for cleaner cuts. Avoid common pitfalls like baking at the wrong temperature or using cold ingredients, as these can dramatically affect the outcome of your bars.
Variations and Substitutions
This Oreo Brookies Bars recipe is versatile! Here are some popular variations and substitutions you can try:- Gluten-Free: Substitute regular flour with a gluten-free flour blend.
- Dairy-Free: Use coconut oil instead of butter and dairy-free chocolate chips.
- Vegan: Replace eggs with flax eggs (1 tablespoon of flaxseed meal mixed with 2.5 tablespoons of water per egg).
- Air Fryer: Cook at 320°F for about 20 minutes for a quicker method.
- Instant Pot: Use a silicone baking pan, add a cup of water in the pot, and cook on high pressure for 25 minutes.
How to Store and Reheat Oreo Brookies Bars
To keep your Oreo Brookies Bars fresh, store them in an airtight container in the refrigerator for up to one week. They’re also freezer-friendly! Wrap them tightly in plastic wrap or aluminum foil, then place them in a freezer-safe bag. They can last for up to three months in the freezer. When it’s time to enjoy your bars again, the best reheating method is to use your oven. Preheat it to 350°F, place the bars on a baking sheet, and heat for about 10 minutes until warmed through. If you prefer the microwave, heat them for 15-20 seconds, but be cautious not to overdo it, as they can become tough.What to Serve with Oreo Brookies Bars
Pair your Oreo Brookies Bars with these delicious options for a complete dessert experience:- A scoop of vanilla ice cream: The creaminess perfectly complements the rich flavors of the bars.
- Fresh berries: Their brightness adds a refreshing contrast to the chocolatey goodness.
- Whipped cream: A dollop of fluffy whipped cream makes for a delightful topping.
- Chocolate sauce: Drizzling some chocolate sauce on top elevates the indulgence!

Easy Oreo Brookies Bars Recipe – Ready in 30 Min
Course: Main CourseCuisine: AmericanDifficulty: Easy1616
servings20
minutes30
200
kcalIngredients
Brownies
113 g (½ cup) unsalted butter – melted
70 g (⅓ cup) granulated white sugar
50 g (¼ cup) dark brown sugar
30 g (¼ cup) unsweetened cocoa powder
2 eggs – room temperature
1 tsp vanilla extract
70 g (½ cup) cake flour
½ tsp salt
80 g (½ cup) chocolate chips
16 Oreo cookies
Chocolate chip cookies
113 g (½ cup) unsalted butter – melted
70 g (⅓ cup) granulated sugar
50 g (¼ cup) dark brown sugar
1 egg – room temperature
190 g (1 ½ cups) all-purpose flour
1 tsp baking powder
A pinch of salt
80 g (½ cup) chocolate chips
5 Oreo cookies – broken into pieces
Directions
- In a bowl, combine the melted butter, eggs, granulated sugar, brown sugar, vanilla extract, and cocoa powder. Mix with an electric mixer until smooth and well combined.
- Add the dry ingredients—flour, baking powder, salt, and chocolate chips—and mix with a spatula until fully incorporated and smooth.
- Pour the brownie batter into a square baking pan lined with parchment paper, and smooth it out evenly with an offset spatula.
- Place the Oreo cookies on top of the brownie layer, gently pressing them into the batter.
- In a separate bowl, mix the melted butter with the granulated sugar and brown sugar using an electric mixer for about 1 minute.
- Add the egg and vanilla extract, and beat again until well incorporated.
- Add the dry ingredients—flour, baking powder, salt, and chocolate chips—and fold them in with a spatula until the dough is smooth and evenly mixed.
- Spread the cookie dough evenly over the Oreo layer, making sure all the cookies are fully covered.
- Top with extra Oreo pieces and bake in a preheated oven at 350°F (180°C) for about 30 minutes, until golden on top but still slightly soft in the center.
- Let the Oreo brookies cool completely in the pan, then chill in the fridge for about 1 hour before slicing into 16 bars with a large sharp knife.
Frequently Asked Questions
Can I make Oreo Brookies Bars ahead of time?
Yes, you can make Oreo Brookies Bars ahead of time! They can be prepared a day in advance and stored in the refrigerator. Just be sure to let them cool completely before covering them to maintain their texture and flavor.
How long does Oreo Brookies Bars last in the fridge?
Oreo Brookies Bars will last up to one week in the refrigerator when stored in an airtight container. For the best taste and texture, try to enjoy them within the first few days.
Can I freeze Oreo Brookies Bars?
Absolutely! These bars freeze well. Just wrap them tightly in plastic wrap or aluminum foil and place them in a freezer-safe bag. They can be frozen for up to three months.
What’s the best way to cut Oreo Brookies Bars?
To achieve clean cuts, use a sharp knife and cut the bars while they are slightly warm. You can also run the knife under hot water and wipe it dry between cuts for cleaner edges.
Can I add more Oreos to the recipe?
Definitely! Feel free to add more Oreos to the brownie or cookie layers for an extra crunch and flavor boost. Just be cautious not to overload the batter, as it might affect the baking time.